Getting started analyzing using C-STAT
Before you perform a static analysis, make sure your project builds without errors. For information about how to build a project, see Building a project.
Choose Project>Options and select the Static Analysis>Select Checks category.
On the C-STAT Checks page, select the packages of checks you want to use. For example C-STAT specific checks.
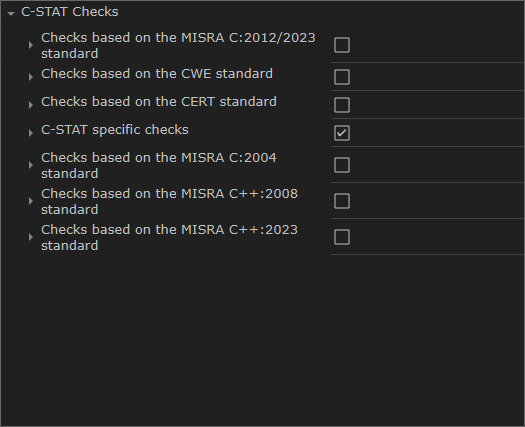
For each package, select groups of checks or individual checks:
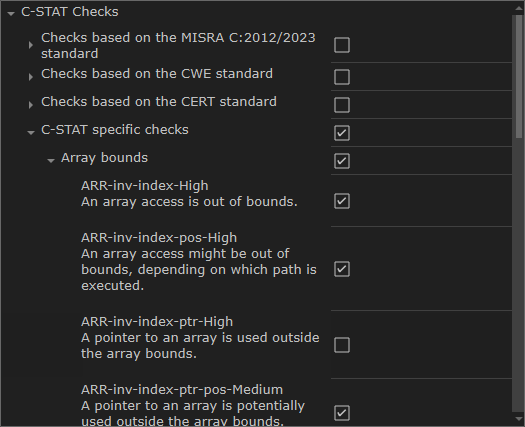
For information about a specific check, see the reference documentation.
When you have made your settings, click OK.
To perform an analysis, make sure the project is active and execute one of these steps:
To analyze your project, select the project in the Workspace window and choose Project>C-STAT Static Analysis>Analyze Project.
To analyze one or more individual files, select the file(s) in the Workspace window and choose Project>C-STAT Static Analysis>Analyze File(s).
Alternatively, use the corresponding commands on the context menu in the Workspace window instead.
The result of the performed analysis is listed in the C-STAT Messages window.
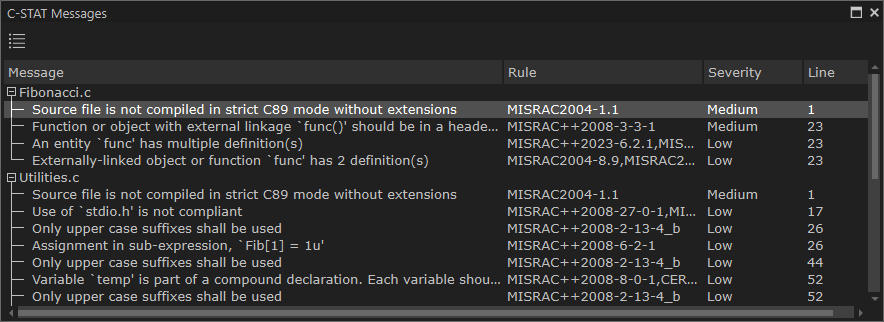
For information about a specific check, see the reference documentation.
For reference information, see C-STAT Messages window.
Note
If there are any problems when analyzing, the Build Log window displays detailed information.
Double-click a C-STAT message to view the corresponding source code in the editor window:
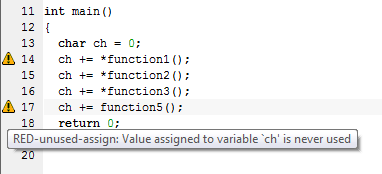
Point at a message with the mouse pointer to get tooltip information about which check that caused the message.
Correct the error and click the next message in the C-STAT Messages window. Continue until all messages have been processed.
Note
C-STAT has a predefined macro,
__CSTAT__, that you can use to explicitly include or exclude specific parts of source code from the analysis, see __CSTAT__. There are also specific C-STAT pragma directives that suppress one or more checks for selected source lines, see Descriptions of compiler extensions for C-STAT.