Editing a file
The editor window is where you write, view, and modify your source code.
The text editor can perform various kinds of indentation. For assembler source files and plain text files, the editor automatically indents a line to match the previous line.
To indent several lines, select the lines and press the Tab key.
To move a whole block of lines back to the left again, press Shift+Tab.
For C/C++ source files, the editor indents lines according to the syntax of the C/C++ source code. This is performed whenever you:
Press the Return key
Type any of the special characters
{,},:, and#Have selected one or several lines, and choose the Edit>Auto Indent command.
Choose Tools>Options and select Editor.
Select or deselect the Auto indent option.
To customize the C/C++ automatic indentation, click the Configure button.
For more information, see Configure Auto Indent dialog box.
To highlight matching parentheses with a light gray color, place the insertion point next to a parenthesis:
The highlight remains in place as long as the insertion point is located next to the parenthesis.
To select all text between the brackets surrounding the insertion point, choose Edit>Match Brackets. Every time you choose Match Brackets (grow) or Match Brackets (shrink) after that, the selection will increase or shrink, respectively, to the next hierarchic pair of brackets.
Note
Both of these functions—automatic matching of corresponding parentheses and selection of text between brackets—apply to (), [], {}, and <> (requires Match All Brackets).
You can split the editor window horizontally into two panes, to look at different parts of the same source file at once, or to move text between two different locations.
To split a window into panes, use the Window>Split command.
To revert to a single pane, double-click the splitter control or drag it to the edge of the window.
Sections of code can be hidden and displayed using code folding.
To collapse or expand groups of lines, click on the fold points in the fold margin:

The fold point positions are based on the hierarchical structure of the document contents, for example, brace characters in C/C++ or the element hierarchy of an XML file. The Toggle All Folds command (Ctrl+Alt+F) can be used for expanding (or collapsing) all folds in the current editor window. The command is available from the Edit menu and from the context menu in the editor window. You can enable or disable the fold margin from Tools>Options>Editor.
Word completion attempts to complete the word that you have started to type, basing the assumption on the contents of the rest of your document.
To make the editor complete the word that you have started to type, press Ctrl+Alt+Space or choose Complete Word from the context menu. If the suggestion is incorrect, repeat the command to get new suggestions.
By default, the editor automatically suggests completions while you type in a C/C++ source file. You can also open the code completion pop-up window manually by pressing Ctrl+Space.
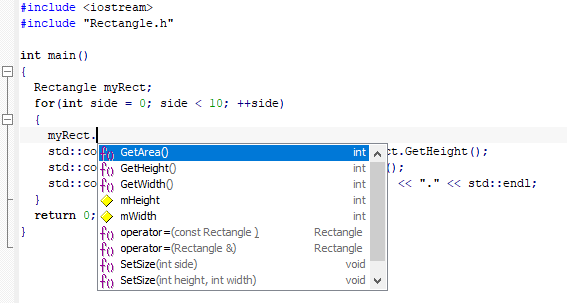
To insert a suggestion, either click it or select it with the arrow keys, and press Enter. To close the code completion pop-up window without inserting anything, press Esc.
The suggestions come from the source browse information and require that the source file is part of a project that has been built at least once.
Many—but not all—of the suggested completions are identified by an icon:
 | Class |
 | Enumeration |
 | Enumeration constant |
 | Function |
 | Macro |
 | Namespace |
 | Type definition |
 | Variable |
To turn off automatic code completion, choose Tools>Options>Editor and deselect the option.
Note
Only active code—code that will be compiled—is suggested.

Code templates are a method of conveniently inserting frequently used source code sequences, for example for loops and if statements. The code templates are defined in a plain text file. By default, a few example templates are provided. In addition, you can easily add your own code templates.
Choose Tools>Options>Editor>Setup Files.
Select or deselect the Use Code Templates option. By default, code templates are enabled.
In the text field, specify which template file you want to use:
The default template file
The original template file
CodeTemplates.txt(alternativelyCodeTemplates.ENU.txtorCodeTemplates.JPN.txtif you are using an IAR Embedded Workbench that is available in both English and Japanese) is located in a separate directory, see Files for global settings.Note that this is a local copy of the file, which means it is safe to modify it if you want.
Your own template file
Note that before you can choose your own template file, you must first have created one. To create your own template file, choose Edit>Code Templates>Edit Templates, add your code templates, and save the file with a new name. The syntax for defining templates is described in the default template file.
A browse button is available for your convenience.
To use your new templates in your own template file, you must:
Delete the filename in the Use Code Templates text box.
Deselect the Use Code Templates option and click OK.
Restart the IAR Embedded Workbench IDE.
Choose Tools>Options>Editor>Setup Files again.
The default code template file for the selected language version of the IDE should now be displayed in the Use Code Templates text box. Select the checkbox to enable the template.
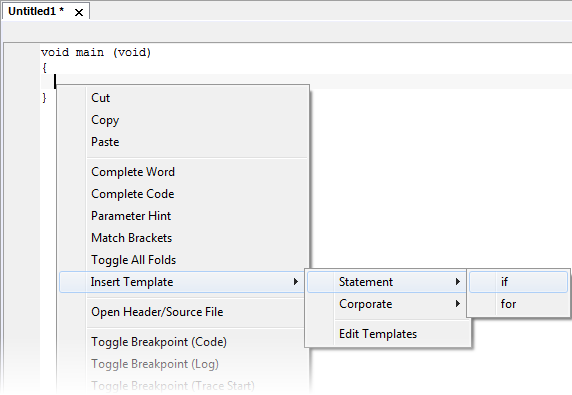
In the editor window, right-click where you want the template to be inserted and choose Insert Template (Ctrl+Alt+V).
Choose a code template from the menu that appears.
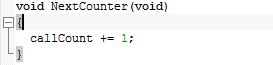
If the code template requires any type of field input, as in the
forloop example which needs an end value and a count variable, an input dialog box appears.
The status bar is available by choosing View>Status Bar. For more information, see IAR Embedded Workbench IDE window.